Tag Archives: flower garden

Bloom into Summer

I CANNOT believe we are rounding out  June this week.  I guess it’s time to take down the Easter decor then huh!?! (no worries, I took it down 2 weeks ago)

I might be the world’s worst gardener.  My thumbs are brown, however I happen to have a husband that manages to keep things alive so I’ll give him full credit for the blooms in our yard.

Purple Iris’ nearly 3 feet tall!

The azalea decided to bloom again after a few dormant summers.


I have no recollection of what these are …any one want to help a friend by identifying these pretty purplish perennial.  I planted from seed several years ago and they are the one happy dance I do every spring.

And the Pink Peony that never last long enough.  Because I feel like these take forever to burst into an amazing bloom, I captured the stage from bud to bloom.

Now that summer is in full bloom, I’ll be returning to my full-time job and life will be insane at least until mid-august at work.  I’m hoping to offer a post at least 2-3 times a week.  Based on my track second that isn’t always realistic, but I will try 🙂


Leave a comment

Filed under Photography, Real Life

Multipurpose Arbor

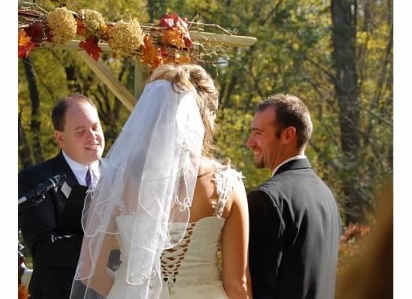
The next of my handy husbands project started 4 years ago, when we were planning our wedding.  We were married outside at my parents front yard, and I wanted some to serve as the focal point for the ceremony.  So he made a simple design that I could attach our rustic swag to and everything was perfect.
 

Of course I have a problem making something for a one time event and I wanted to reuse as much of our wedding decor as we could.  Just so happens we completely landscaped our yard the following year and the arbor was a perfect addition to our garden under the big pine tree.  Unfortunately for the arbor, an insane wind storm took the arbor to a state of disarray to the point that it was completely twisted.  RIP wedding arbor.

Last summer I talked my husband into creating a garden path into our garden under the big pine tree, by using the left over stone from our basement fireplace. (Yes my 1 year old little man supervised this project). He also laid all the landscaping stone you see to make this a raised bed.

Ooo, that wooden wagon you see in the picture above was made by my husband for our wedding too.

I digress.  Sorry, back to the arbor.  Turns out I really wanted out garden under the big pine tree to have a little welcome place, especially now since we had a cute little path.  And I love planting Morning Glories and they like to climb! So one day I came home and this is what I saw.

Apparently my little man liked it too!

Unfortunately my husband doesn’t capture the process of his creations for my blog.  All of the projects you will see this week he creates in his head.  if you are looking for plans for something email me and he can maybe help you  out!

Leave a comment

Filed under DIY Projects, Handyman

DIY Garden Path

Do you ever have left-overs after a project and not sure what to do with it?  My husband and I finished off our basement this winter.  One of the main projects was adding a gas fireplace with a stone surround.  While I LOVE the way it turned out, putting this puzzle together was not easy.  Unlike most puzzles there wasn’t a picture to follow.  You have to figure it out, and no two piece are alike…but I was able to do it (Yes I designed the layout and the husband made it happen).

So what does this have to do with a DIY Garden Path?  The boxes of these bad boys come in a variety of sizes, colors and dimensions.  While we didn’t need all 4 boxes, we needed to pull random pieces from them in order to make our masterpiece- hence we have several boxes of random, super heavy stones that might not be enough for another project,  and this style of stone has been discontinued.  Reselling them could be an option, but it might be a bit rude to the next user.  Our next best option was to use them for landscaping.

The hardest part was hauling them outside from the basement storage.  Then the husband simply cleared away the mulch, leveled the ground with flat shovel and began laying the rocks.  (My son played supervisor on this project)

We added a trailer full of mulch…Quick Thrifty tip: if you don’t want to break the bank on mulch, lumber yards chip their scraps and sell an entire trailer full of wood chips for $40 in our neck of the woods,  That trailer filled this bed, plus the bed around the entire perimeter of our house and a second raised bed by the garage.  We found the easiest way to spread the mulch was to use 5 gallon buckets.  Dump the buckets of mulch in the open areas in your beds and then go back later and spread the mulch out.  We even put buckets over the top of the stone path then took a broom and swept to sides.  This allows some mulch to get into the cracks making the stones a bit more stable…. I digress.  Here’s how she turned out.

I thought that was impressive.  Then I came home 3 days later from work and my husband surprised me by making the Arbor I’d been begging for since the one he made for our wedding was destroyed in a storm. Apparently this one is more durable. Shows how those little details can really polish off a project.  (I should note the wooden wheelbarrow in the background holding the pots of flowers he made for our wedding too).

You can see from the middle picture above that the spacing of path slowly spreads to reach the chairs.  Overall I’m happy with it.  It keeps the weeds down, add a touch of garden elegance, used up 2 huge boxes of Rock and just cost us a little time, sweat, and creativity.

This post is being shared at:
Not Just a Housewife: Outdoor Spaces

2 Comments

Filed under DIY Projects, Handyman